What basic equipment will you need if you want to get started with hobbyist electronics? It’s possible to put together a useful hobbyist electronics toolbox relatively cheaply with a few key tools. Whether you’re building FPV drones, repairing retro computers or hacking Arduinos and Raspberry Pi’s, a basic soldering kit and a multimeter can go a long way. For more complex projects you might also need a bench power supply and test equipment such as an oscilloscope, but you don’t have to spend a fortune to build your own mini electronics lab.
Essential Tools
I’ve collected a whole range of tools over the years, some of which have ended up being used regularly, and some of which seemed like a good idea at the time but now collect dust at the back of a drawer. It turns out the essential tools can fit in a shoe box, so setting up your own electronics lab doesn’t require that you spend a fortune or rent out an industrial unit. You will need to be able to find a clear table top to work on, but a basic hobbyist electronics setup is surprisingly inexpensive and portable.
Precision screwdriver set
A simple set of cross head, flat head and hex screwdrivers is worth it’s weight in gold. Mine is decades old now and I’ve long since lost the plastic case they came in, but they get used constantly and should last a lifetime. Try this Stanley Set on Amazon.
Needle-nose pliers
For general purpose cutting, gripping and forming, a good pair of needle-nose pliers aren’t exactly the most delicate of tools, but are utterly invaluable. Again Stanley offer a good pair on Amazon.
Side snips/wire cutters
Cutting wires, removing the excess leads of components, or removing components from circuit boards needs a small, sharp and accurate set of snips. I use these cutters.
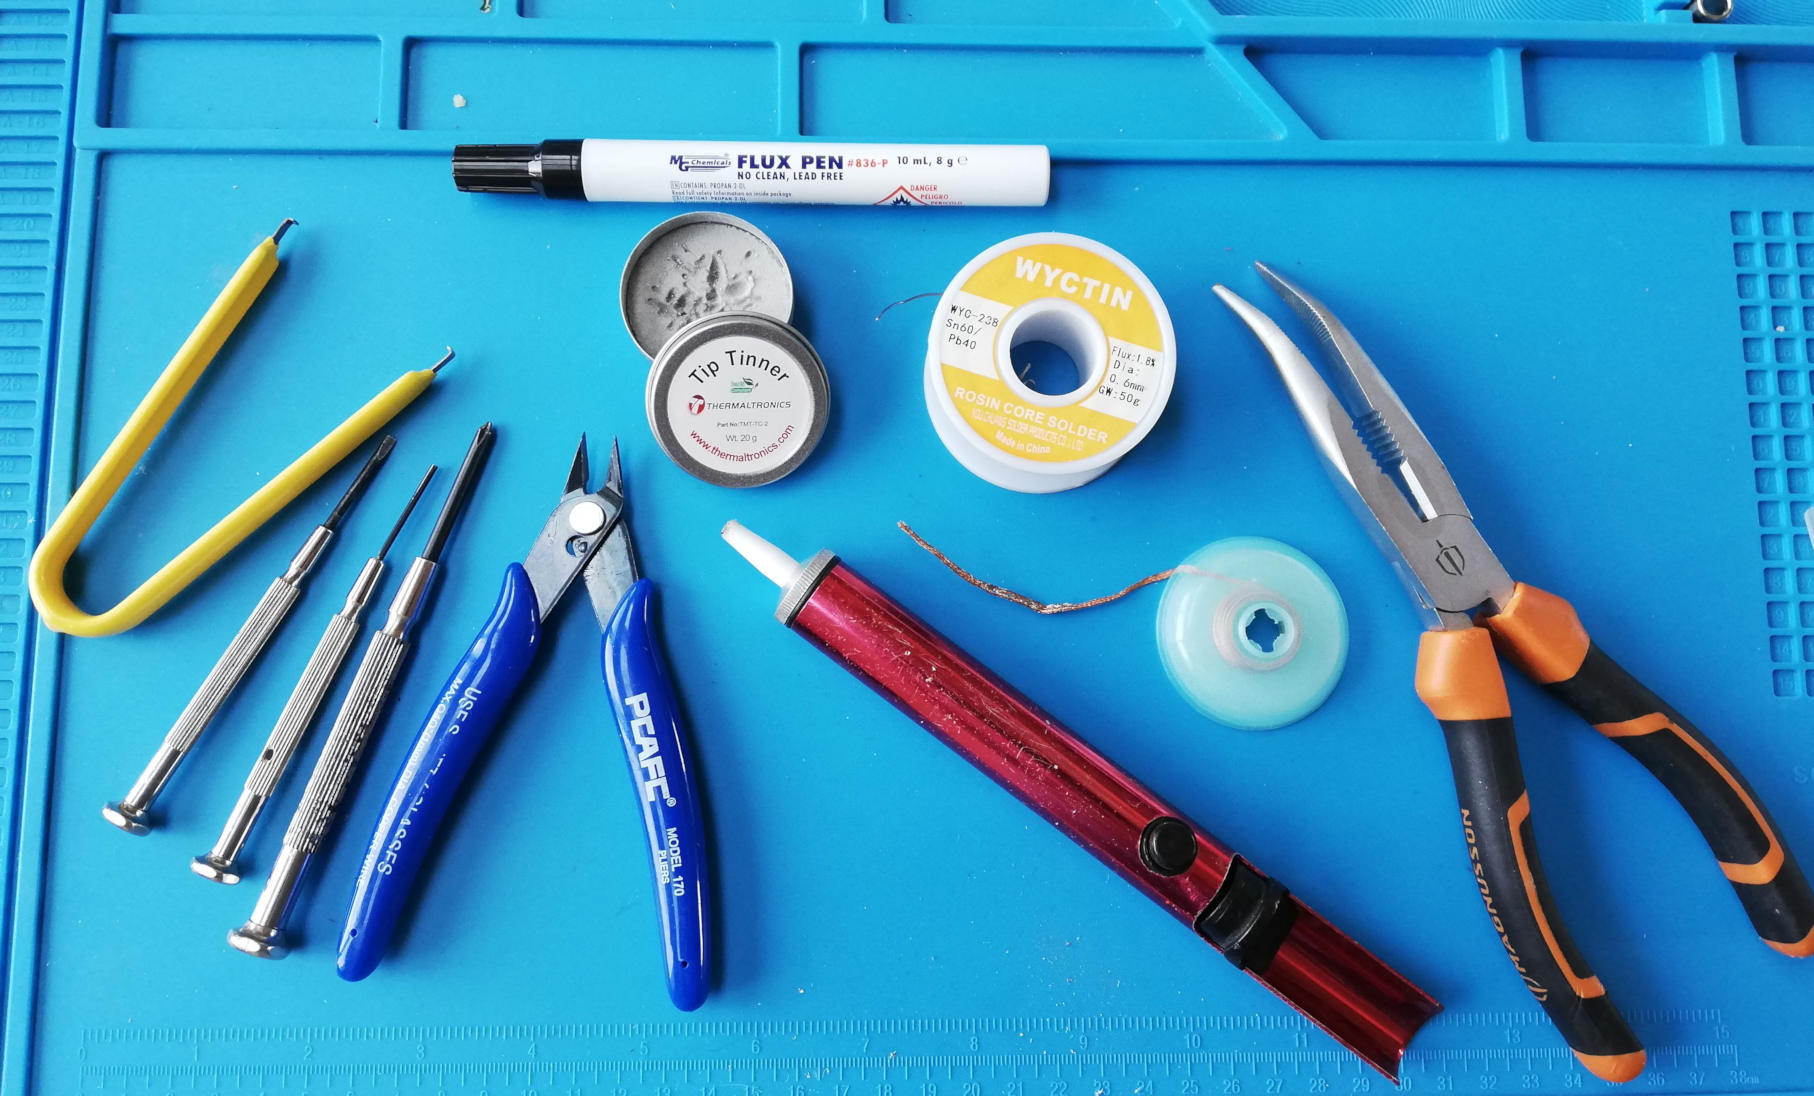
Solder Kit
To make a reasonable job of hand soldering, you’ll need 60/40 lead solder (lead-free may be more environmentally friendly, but is much harder to work with), tip tinner and flux pen. If you’re planning to remove components, or make good your mistakes, you’ll also need some desoldering braid and a manual solder-sucker - which can be bought together here.
Chip Extractor
This is really only valuable if you’re expecting to repair older computers, but a chip extractor costs very little and saves the risk of damaging chips as you get them out of their sockets. Amazon offer this tool for next to nothing.
Mats… Lots of Mats
This has been a late addition to my toolset, but a silicone anti-static soldering mat is a great addition to an electronics toolbox. A good mat will have places to put screws and other components to stop them from rolling off the table, and provides a clean, plain surface that will resist damage and prevent you from losing components. These mats are not designed to resist cutting, so a separate cutting mat is also recommended. Examples are here (soldering mat) and here (cutting mat).
In addition, if you’re going to be working with static sensitive components, an anti-static (ESD) mat and wrist strap come highly recommended. Whislt you can get vast mats that will cover an entire desk, they’re far from cheap, so a smaller mat like this one is a convenient and portable alternative.
Soldering Iron
For many years, I used a simple 60W mains soldering iron and had reasonable results. It’s possible to buy a straightforward kit on Amazon (Tabiger receives reasonable reviews) for about $20, with a few useful tools and a starter pack of solder included. I’d steer clear of the ‘all in one’ kits that throw in every last tool in the box, as the quality is likely to be poor, but the basic iron will certainly get you going. Unless you have a specific need for it, there isn’t much point in going for a portable soldering iron - these can be pricey and can make a few compromises in the name of convenience.
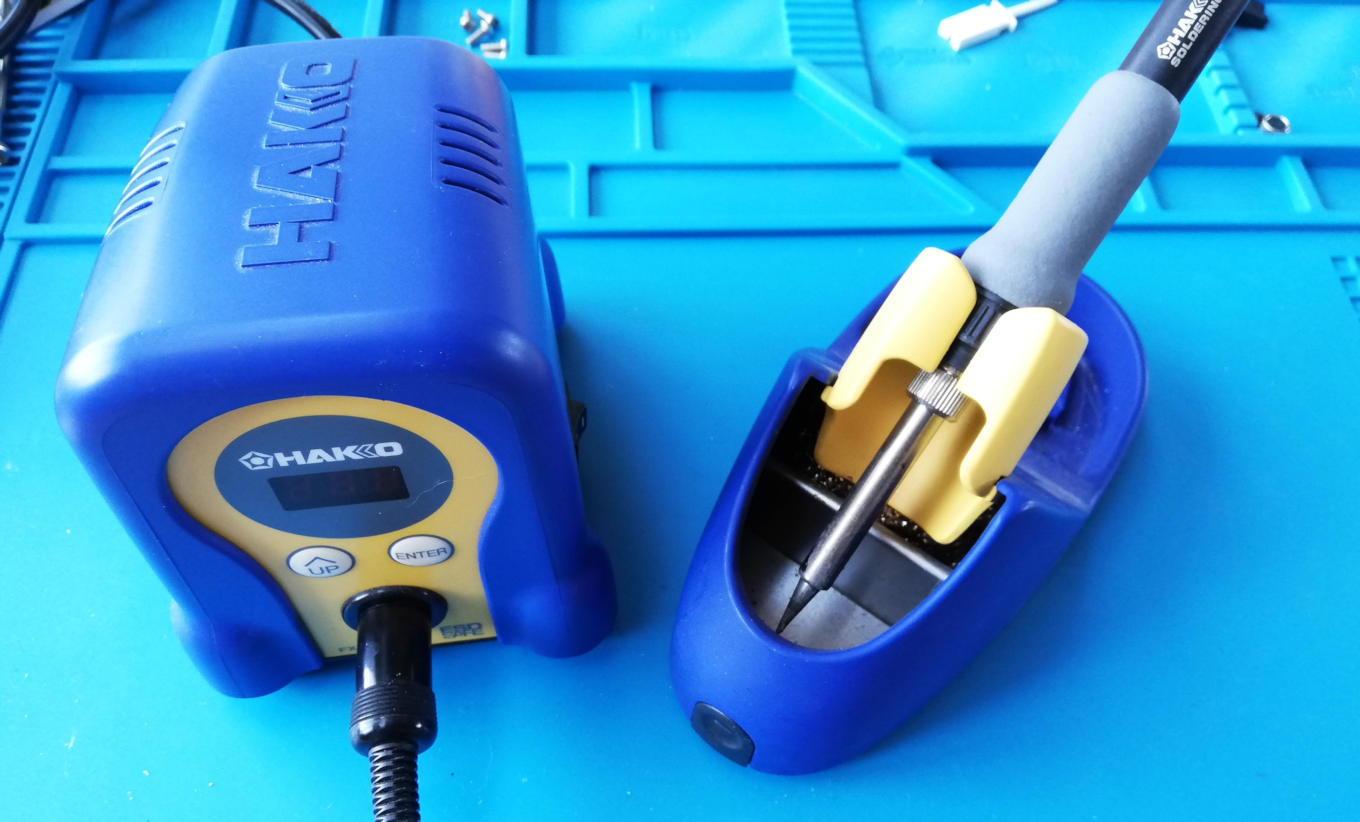
However, a good quality soldering tip and an iron that can accurately keep it’s temperature will make soldering so much easier, so an early upgrade would be to a soldering station such as the Hakko FX-888D. This is undoubtedly a serious purchase, but the quality is excellent, from the very flexible lead to the solid base station and unshakable stand. It’s worth noting that the reputation of the FX-888D is so good that there are a lot of clones out there, so beware of bargain prices or items that “look like” the Hakko. A soldering iron can be an incredibly dangerous tool if it is not properly built, so make sure you’re buying original parts.
Multimeter
When it comes to test equipment, the choices are endless, and prices go from pocket money to family car levels. Almost all test and diagnosis starts with a multimeter though, and for the hobbyist a perfectly decent multi-function meter can be bought quite cheaply. Being able to check voltage levels and basic continuity with a solid tool is useful not only for hobby electronics, but also when working on your car or around the house (remember that mains electricity is significantly more dangerous than small battery circuits - take advice before tackling home wiring).
My multimeter is ancient, and I would be suprised if it’s very accurate, but for most tasks this is not so important as being able to get a rough idea of what is going on. I’d also recommend getting a set of test clips to avoid needing six pairs of hands when testing devices.

Advanced Tools
The list above is enough to be able to build your own small projects and test for basic faults in retro computers (and, ahem, your own projects). There are often suggestions that you might need more advanced equipment, but this very much depends on the sort of projects you are working on, and your own technical understanding. Whilst a fully featured oscilloscope may be a very appealing option, unless you are quite good with your electronic theory and actually working on things like high frequency or audio projects, it’s not going to help much.
However, if you’re building your experience, these items may also help:
Bench Power Supply
If you’re testing existing equipment, or building a hobbyist electronic kit it’s very likely it already comes with it’s own power supply or runs off USB power. Therefore, whilst a bench power supply may seem like a useful purchase, you may find you don’t actually use it that often. My bench supply was rescued from an office that was closing down, and it often sits unused as I’ll run things from battery or a wall adapter. The main exception here will be powering sensitive or potentially faulty circuits - in which case a power supply that can safely limit current and not over-power devices is vital.
The significant things to consider in a power supply are the voltage and current ranges, the number of independent outputs and whether the supply is a switching or linear unit. Most hobby-level power supplies will have sufficient voltage and current range (up to 30 volt and 5 amp being a common output). If you’re on a budget, then a single output is pretty much the norm. Switching power supplies are often smaller, lighter and cheaper - but can produce much noisier output than linear supplies. If your circuits are likely to be affected by noise and you cannot include additional smoothing and regulation, then a linear power supply will be necessary.
A couple of options are this linear supply or this switching supply
on Amazon (note the smaller output range of the linear unit).


Oscilloscope
Buying an oscilloscope is a big committment, with decent budget level machines starting at around £200. Here, specs are key. It’s important to avoid buying an expensive piece of equipment that cannot actually provide useful information about the devices it’s measuring. There is however one super-low budget option which may be worth investing in, so long as you understand the (big) limitations - I’ll come to that later.
If you’re debugging video circuits or high speed analogue circuits you will need a high enough bandwidth to capture signals accurately. The essential rule of thumb here is the ‘five times rule’, which states you need an oscilloscope with a bandwidth at least five times that of the highest frequency signal you wish to capture. Most entry level ‘scopes come with a 100MHz bandwidth, meaning they can accurately capture sine-wave signals up to 20MHz. To put this into context, an NTSC video signal is around 6MHz, and a 640x480 VGA signal around 25MHz - pushing right at the limit of many beginner scopes.
If you’re debugging digital circuits this rule still applies, but you will also want to be able to capture the rise time of signals. A similar rule of thumb to bandwidth is suggested, that the rise time for a scope should be less than one fifth of the fastest rise time of the devices being checked. For TTL or CMOS circuits, this may be around 300ps to 400ps. These recommended figures are much smaller than entry level ‘scopes usually achieve, but give an idea of what you’re aiming for if accuracy is paramount.
Finally, it’s important to consider the sample rate which (again) tends towards a five times rule - to accurately capture a signal, a ‘scope needs to sample at five times the highest frequency component of a circuit. Both sample rate and rise time will determine a ‘scope’s ability to detect glitches.
In 2021, then, what can you get if you’re looking for an entry level model?

The Hanmatek DOS1102 is sold under a number of different brand names, and offers 110MHz sample rates, 1G samples/second and a rise time of less than 3.5ns. For a little over £200 it has two channels and seems to be well received as a budget scope.
If you search for really cheap ‘scopes, you’ll quickly find a range of devices that cost a fraction of the Hanmatek and similar professional offerings. These are based around cheap microcontrollers and analoge to digital converters, running simple software that (sorta) replicates the functionality of bigger machines. Unfortunately, it seems that without exception you get what you pay for - these devices are regarded as unreliable and innaccurate, and often perform below the level their (already low) specs suggest.
On the whole, it’s best to avoid these devices - with one exception.

The JYE Tech ‘DSO Shell’ Oscilloscope Kit is an incredibly cheap hobbyist kit that allows you to build your own simple oscilloscope. Be under no illusions about the spec of this device - a mere 200kHz bandwidth, and 1M samples/second put it at a fraction of the Hanmatek above. However, for examining simple circuits and the pleasure of building an easy kit, it may be worth the few pounds it costs to buy.
Logic Analyser
Like oscilloscopes, professional logic analysers start at prices that a hobbyist will find scary and only get more expensive. There are a lot of features to compare, from the bandwidth and sample rate (similar to an oscilloscope) that will determine which signals can be captured, to the ability to decode and measure common protocols and data formats.
Happily, so long as your signal frequency is within it’s limits, there is a very cheap option available, the Hobby Components 24MHz USB 8 Channel Logic Analyser. This device plugs into your PC and uses the incredibly powerful open source Sigrok PulseView software.

This super low budget analyser is capable of capturing and decoding RS-232, I2C and many other protocols, with the only big limitation that you’ll need to be able to get a PC (or laptop) fairly near the device being tested.