Today’s adventure is a (relatively straightforward) revival of the Enterprise 128K that has been lurking in my loft, and a review of the Wavlink Composite Video adaptor. The two products have nearly forty years between them, but they work well together to bring retro computing to the big (ish) screen.
Converting a vintage computer to produce composite video is a fairly straightforward procedure, requiring a little confidence with a soldering iron and solder-sucker. It takes around ten minutes to perform on common 8-bit computers that use the UM-1233 modulator. Once complete, a composite video adaptor like the Wavlink will connect your computer to any modern TV or monitor. It’s a cheap and convenient modification that can be reversed if you wish.
Reviving the Enterprise 128K

I picked up this boxed Enterprise 128K in the 90’s from a game studio that was throwing out equipment that was no longer needed in the modern era of PCs and Playstations. Other than recognising it as a fairly rare piece of retro tech I didn’t have much time or use for it back then, and a quick test revealed that the keyboard was only partially working. Like any good hoarder, I stuck it in the loft and forgot about it.
Despite it’s rare value, the Enterprise also remains largely forgotten by the wider retro community. Though it had many cutting edge features when first announced in 1983, it suffered a slow and painful launch. Only an estimated 70,000 machines were eventually built before the company behind it collapsed. Yet despite it’s relative scarcity, boxed machines still appear on Ebay at suprisingly reasonable prices. This perhaps reflects the fact that the Enterprise got very little support when it was finally available, and the library of titles written specifically for it is small. There simply isn’t that much to do with an Enterprise that you can’t do with a Spectrum or Amstrad of the time.
There is an excellent article in The Register from 2013 that covers the complex and fraught history of the Enterprise. Enthusiasts of the Retro scene will perhaps recognise one of the names behind that disastrous launch - David Levy more recently being known for the equally chaotic attempt to produce the Vega retro handheld. If you’re interested in the history behind the hardware I strongly recommend The Register’s coverage of both stories. Today, I’ll stick to the technical details.
Ins and Outs
Being otherwise in excellent condition, there were only two jobs that needed doing to the Enterprise to get it working. The first was to fix the keyboard, and the second to make the necessary modification to connect it to a modern screen. In common with quite a few machines of the time, the Enterprise used a membrane keyboard which saved money over an array of switches but made for a poor typing experience. Worse still, the low quality plastics in the membranes degraded over time and are a common point of failure for old machines. Luckily, Sell My Retro have a range of replacement membranes for this and a number of other computers, produced using the latest plastics technology that should be more immune to perishing. So a quick purchase led to a large flat envelope (“Do not Bend!”) arriving in just a couple of days.
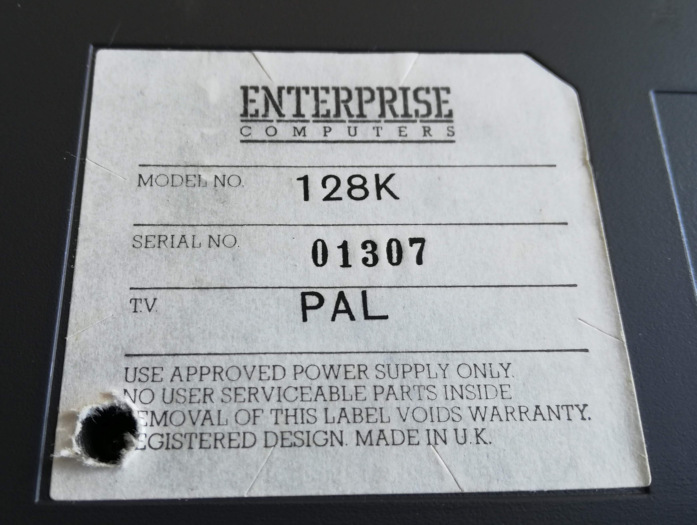
Fitting it was a relatively straightforward process. The Enterprise has 14 self-tapping screws holding it together, all easily accessible with the exception of the one hiding under the label shown in the picture on the right. Technically, I have not removed the label, so the guarantee is still good! With the machine upside down, the base lifts off and the existing keyboard ribbon can be gently pulled out of the two sockets, allowing the two halves to be separated. The keyboard design is a little bit complicated, made up of keys sitting on a rubber mat (still in good condition on this machine), which presses down on the membrane. A flat plastic panel holds this sandwich of components together, but on my machine this panel is only held in place by the bottom part of the case. That means that once the Enterprise has been opened, the keyboard is rather prone to coming apart. Keeping the whole assembly upside down, it’s not too difficult to juggle out the old membrane and put the new one in place, and then the two halves can be reconnected and screwed back together.
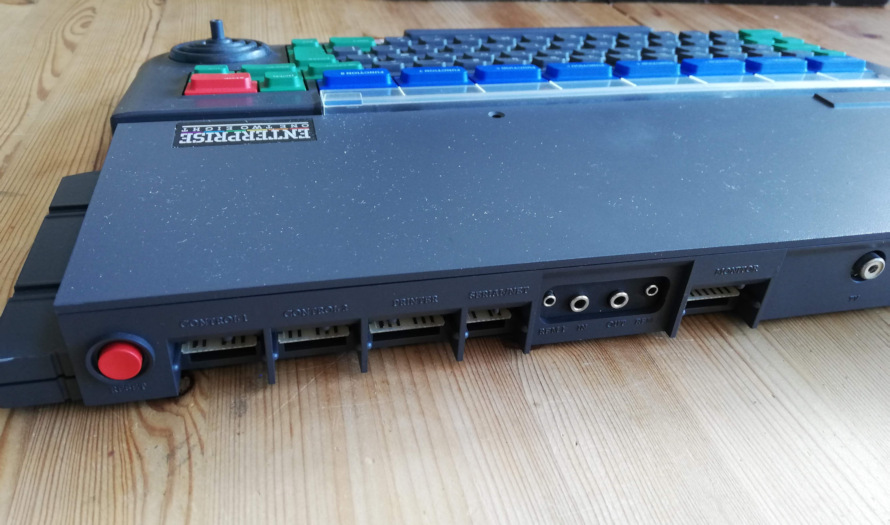
However, having the machine open is the perfect opportunity to check the condition of the motherboard and perform the necessary modification to get a good composite video signal out of the Enterprise. At the time, the range of ports built into the Enterprise was seen as generous, with RF, RGB and composite video all available. However, the composite video signal in question is black and white only, no modern monitors support RF and the RGB connection (along with Scart connectors) has been consigned to history. This is where the Wavlink comes in.
Like many computers of the time, the Enterprise generated its RF output from an internal colour composite video signal using the UM-1233 modulator. This is a small metal box that appears on many 8-bit motherboards and houses a bunch of components that need only five volts and a video input to produce the necessary RF signal for a vintage television to tune to. It’s a relatively straightforward job to disconnect the power and output wires, and then connect the video input directly to the output socket. This fix means that, with no externally visable modifications the computer can be connected to any monitor that accepts composite video. Even better, converters are readily available that take any composite video source and connect to a standard HDMI cable. This makes connecting your computer to a monitor a snap.
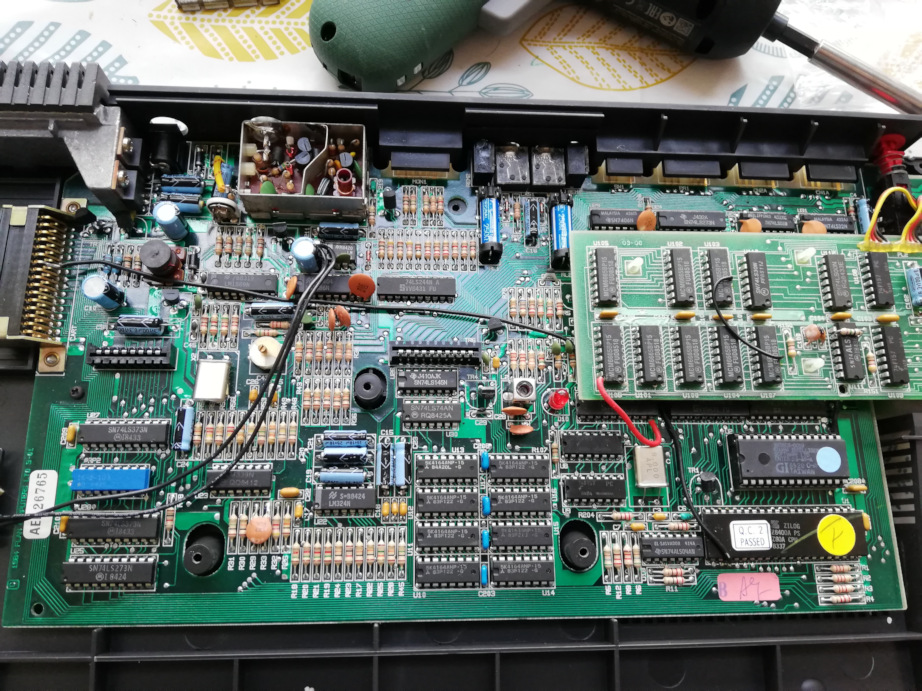
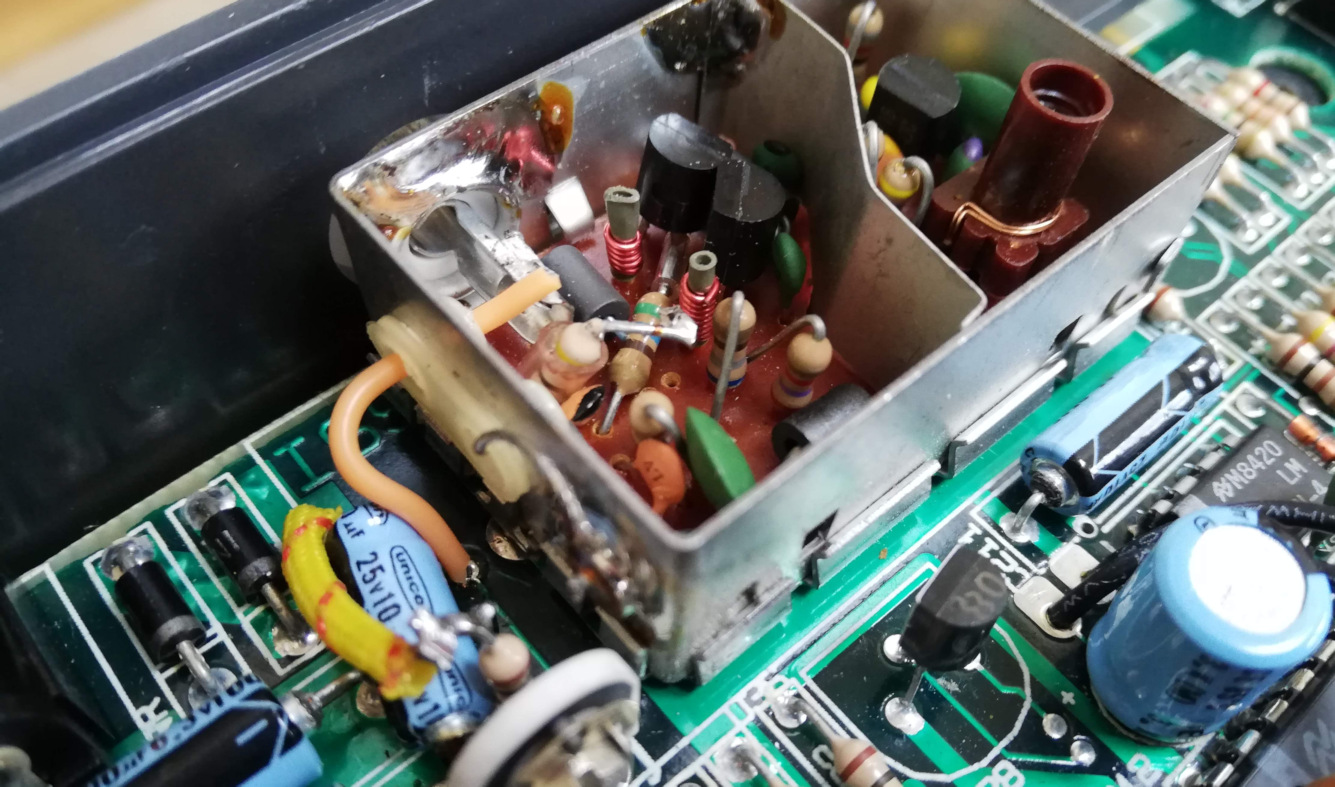
The picture above shows the Enterprise motherboard - quite neat, with a small daughterboard on the right for the extra 64K Ram in the 128K model. The UM-1233 modulator is top centre, with the metal lid taken off. The motherboard is held in with two screws (middle left and middle right, with a hole in the daughterboard to reach it with a screwdriver). Then the heatsink on the top left can be slid up and the whole board lifted up and towards you to come free.
There are plenty of explanations online on the exact details of the composite mod, with a few variations. Some simply connect a wire in place, others suggest an additional capacitor and a few (referenced on some of the Enterprise sites) suggest a little transistor circuit. I took the easy option and just connected a wire. This seems to produce a reasonable signal, though the black is a little washed out and pixels have the traditional retro colour bleed to them. Without a more complex and expensive circuit, it gives a very useable output with minimal effort. Note that there is a variable resistor on the motherboard near the modulator that adjusts the bias of the video signal. I avoided changing this for fear of causing damage, but it may be possible to adjust the display to get increased clarity.
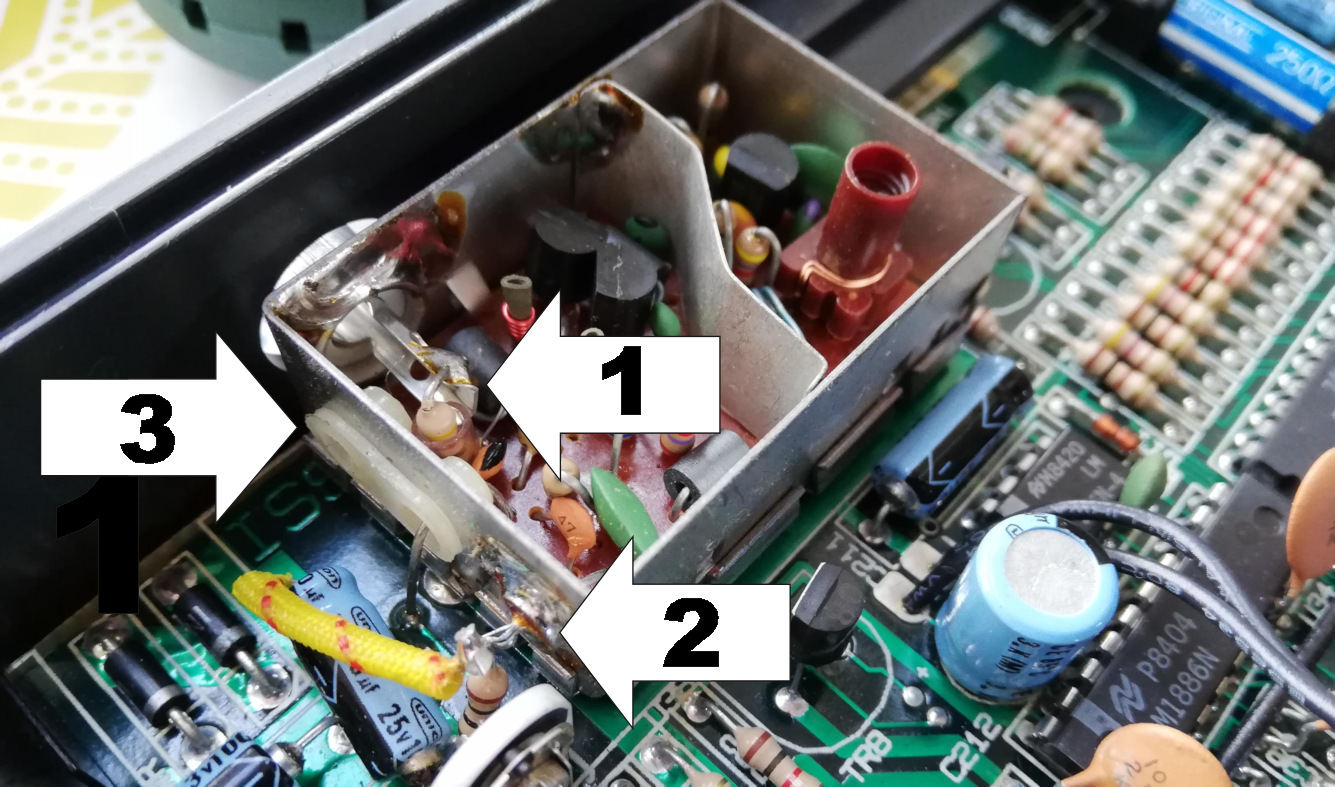
The order of proceedings is to (1) unsolder the resistor from the centre pin of the RF socket and (2) Disconnect the (messy!) five volt input to the modulator. Both of these can be pushed to one side to avoid any contact. Then, on the left of the modulator is a white plastic grommet (3) with two holes. The composite input currently goes to the ‘bottom’ of these in the picture. This wire needs to be carefully unsoldered from the motherboard and pushed out of the way. I found the easiest way to do this is to use a solder sucker on the underside of the motherboard. Then a new wire is soldered to the now free connection. A small drill bit or similar is needed to enlarge the other hole in the grommet, so the wire can be pushed through and soldered to the centre pin on the RF socket.
And here is the finished job. The orange wire takes the composite video signal from the motherboard and connects to the RF socket. (Note: this only works for computers that don’t include an audio signal on the RF output. Luckily this includes the Spectrum, ZX81, Enterprise and a number of other machines.)
Ready to Go
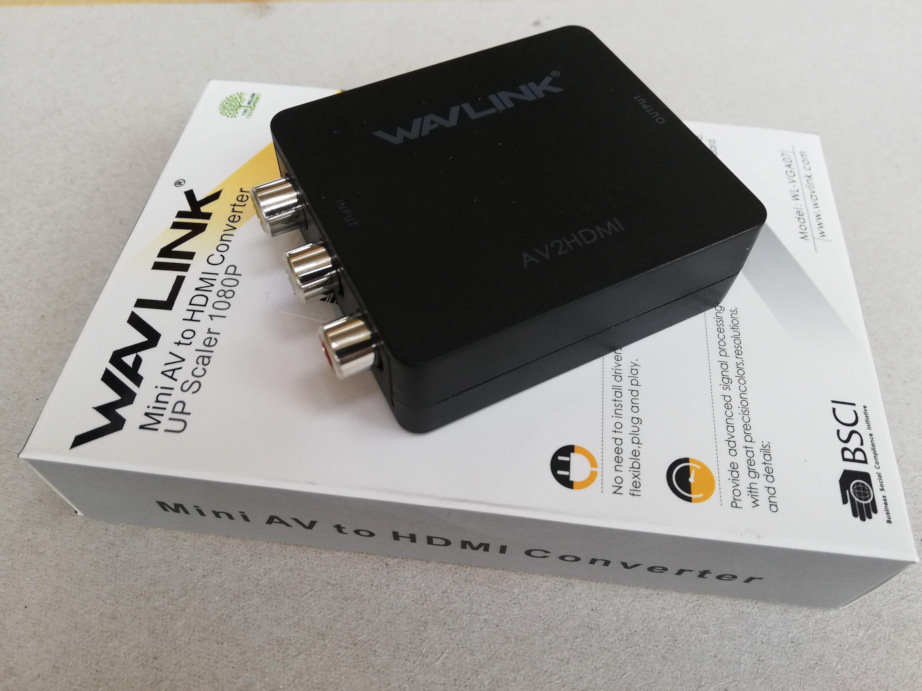
Once everything is screwed back together, it’s time to test - not only the Enterprise, but also the Wavlink composite adaptor, bought from Amazon. It’s a small box, roughly 6cm (2”) square, with composite and audio sockets on one side, and a HDMI socket on the other. There’s a switch to select 720p or 1080p output and a USB socket for power, and that’s it. The device only comes with a USB cable, no others, and no power adaptor, so you must supply your own.
The Wavlink is a simple device that ‘just works’ and makes it near painless to use vintage computers with current TVs and monitors. Connecting it is simple. When there is power, it shows a blue screen on the monitor and a ‘No signal’ message. Plugging in a computer with a composite video out and powering it up doesn’t instantly produce a picture, but it catches up and the display is stable. For retro equipment with low resolution displays, the 1080p and 720p modes produce near identical output - and there is nothing else to adjust.
It was a slight surprise that the bare Enterprise doesn’t drop you into a command line when powered up. Instead, the built in software is a word processor. That’s actually quite handy though, as it makes testing out the full keyboard easy. There’s a ‘click’ from the built in speaker with each key press. The joystick can also be used to move around the document. Happily in my case everything worked first time.
To do more, the Enterprise came with a separate BASIC cartridge. If that is plugged in when it is switched on, the traditional command prompt appears, and you can enter a program. Alternatively, type ‘load’ and hit enter and it will load software from tape.
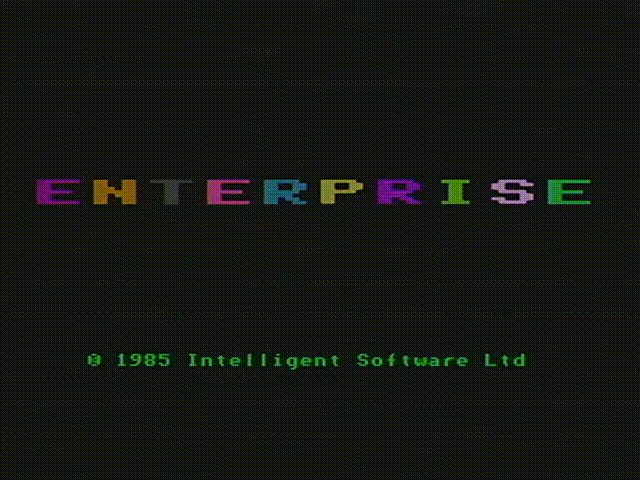
This is a screen recording (with a little colour adjustment) directly from the Enterprise via the Wavlink adapter.
I found a useful tool, EPTE which works on my Windows 10 PC to play Enterprise tape files. Connecting an audio lead between the PC and Enterprise (and turning the volume up a lot) is good enough to load software. Helpfully, when loading, the Enterprise shows a green bar at the top of the screen that turns red if the signal is not strong enough. EPTE comes with a library of files to try out. Many of these are Hungarian conversions of Spectrum or Amstrad titles. The Enterprise was close enough to those machines that conversions were relatively easy, and the Hungarian and Czech homebrew scenes seem to have been the one place where the machine found enough favour to encourage people to adapt the software.
Specs
For reference, these are the Specs of the 128K Enterprise:
| Processor | Z80 4Mhz |
| Ram | 128K, expandable to 4Mb(!) |
| Rom | 32K - EXOS operating system and Word Processor |
| Cartridges | Up to 64K |
| Display | 640×512 2 colour (interlaced) |
| 320×256 16 Colour (attribute) | |
| 80x256 256 Colour | |
| Maximum colours | 256 |
| Sound | 4 Channel Stereo, custom chip. Ouput through in-built speaker |
| I/O | RS232/RS432, Centronics, 2 x Tape, RGB Video, Audio |
Both the video and audio were handled by sophisticated custom chips, called Nick and Dave(!). The video chip (Nick) was capable of quite a few different modes, with 2, 4, 16 or 256 colours at different resolutions. It was also possible to split the screen and have different modes on successive lines of the display. This is interesting to me as it’s a similar scheme to the one I’m proposing for the Legion homebrew computer I’m designing. The audio chip included filter and ring modulation effects (more like the Commodore 64’s SID chip), and complex envelope generators to control pitch and volume. Sadly, these capabilities were never really exploited, and there are few demos that show what the machine might have achieved if there had been a larger following.
Useful Resources
- Enterprise Museum - Includes a large number of downloadable games
- Enterprise Forever - Forum with Wiki and download section
- lgb.hu - In-depth technical documentation and emulator